Showing posts with label sewing machine. Show all posts

Tuesday, May 26, 2015

Cutest Dress Award Goes To....Modkid Gretchen!


Y'all don't even know - I'm so excited about this dress.  I'm not sure if it's the short sleeves (Camden's vote), the dotted sateen - or the overall springy feel to it.

But for REAL, folks.


I sewed the Modkid Gretchen a few years ago (why has it been so long???) in Heather Ross fabric....for our non-exciting courthouse wedding.  Look how small Camden was!!!  (Also note that I accidentally used fun oils in the tub that day for her - and totally washed her hair with that oily water...)


Anyway, nothing riveting to say about the pattern itself, other than it's lovely.  The instructions are great, it goes together quickly, etc.  I will say, however, that I LOVE to burn myself when making things like the ties on this dress.  I for real have a blister from that stinkin' iron, LOL.

Also, you can see in the pictures that I have a bit of a puckering issue in my center front and back panels, which is a bummer, but whatevs.  I'm happy to get the chance to bust out a project these days, so, I'll take it, LOL.


The main fabric is actually something Matt picked out when we were in Seattle a few years ago, too, and I grabbed the sateen again from Superbuzzy.


This pocket already stores a "key," which which she was "unlocking" doors today ;)
I love how simple this pattern is - yet how fun the effect is!  Camden way loves it, and shortly after these pictures were taken, she of course went to her friend's house and dirtied it up ;)  Her ballet teacher totally approved of the dress, dirt notwithstanding!

Lastly, this is life 'round these parts these days.....
Helping his mom!

Ferrying over to Bainbridge Island
Ohhhh, good.....
Those newborn sleep sacks fit well at age 5....

Fun meet-up!
Wee date night....he is SO cheery!

Friday, September 12, 2014

That Whole Two-For-One Special - Starring the Family Reunion Pattern!


Do NOT look closely at the wacko ruffle stitching!!  I twinge looking at it!!  I might have to fix it.

I have to say this straight off - the Family Reunion is an easy cheese cream pie pattern!!!  I like that from Oliver and S, which can be soooo detailed sometimes (which is also great....otherwise, why would Camden's closet be full of their patterns??).  It's funny, now that I have more experience with sewing - and especially with sewing Oliver and S patterns - I'm noticing that there are so many directions I can totally ignore.

Now.

I SAY that, but really, I still take a peek, because I'm that person who misses things alllll the time, so, I like to be extra careful....when I'm actually thinking about it.  And speaking of....with this particular pattern, I certainly DID mess up, as I though the facing pattern pieces were INSIDE the dress, but that was alllll a lie, LOL.  I didn't even know the term "facing" could mean something is on the OUTSIDE. I should go look that up.  The point is that I totally wasted time, thread, fabric and facing by cutting out the facings on shot cotton....because if I'd known it was an outside piece (meaning, if I had even LOOKED at the picture, aha!), I would have used the main fabric, as I wanted these projects to have a pretty clean look.  Suffice to say I decided the shot cotton would work on the dress version - but NOT on the top version, so, I re-cut, etc.


Sometimes, with Oliver and S, I remember to look up errata for a pattern, but I didn't happen to check this time, and everything went together smoothly (minus the facing mis-hap).  Pintucks clearly take some energy, especially because there are NINE just on one garment...and I was doing TWO garments.  So, I assembly-lined that shiz, and all ended well.

I again (I say this alll the time, I know!) used stash fabric.  Well, let's not get hasty - I did that for the top (I just hadn't know for the LONGEST time what to do with the ONE yard!) - but I bought the flower fabric for the dress just last October, actually planning to use it for a coat.  Oops ;)  (And now that I'm thinking on it, wouldn't a VEST for the Art Museum pattern be cute with that???)  I had to purchase new buttons (seriously...I have soooo many great buttons; why does NOTHING ever work for a given project???  I guess y'all should refer to THIS post from last year) today on the cheap - coupons at
Jo-Ann Fabric Store.  Tiberius and Camden helped out, and a nice customer at the store chatted us up while we did picked them out.  (Side note:  I have a beef with Jo-Ann Fabrics.  Why'd you change up the button situation???  I swear they removed a line of buttons and replaced it with an even cheaper-looking line, which is a dreadful thing!)


The only modification I made to the top was to lengthen it by an inch, as I know how that story will end if I do NOT lengthen.  And, as seen in the pictures, I chose to use the button tab for the dress and the ruffle for the blouse.  You may have guessed by now, but I'm not super frilly and into ruffles, so, this was stretching it for me, and I think it works....???  Jazzes it up a teeny bit?


I did my most BANG-UP sewing job EVER on the snaps, too - check it out!  I have a weird thing about sewing on buttons.  I refuse to sew them on by machine, as I think I make a tougher anchor than a machine (I'm weirddddd), and I sort of like doing it, even though I'm straining my eyes and all hunched over (no, seriously, I was pretty sure I threw my back out for a split second while sewing those buttons).  I was super impressed, though, by my snaps.  When you have to use snaps as an anchor point, it can be tricky trying to finagle the sewing of them under a decorative button.  I'm not sure how any of y'all do it, but I want the snaps to be secure....yet not UGLY, right???  Check it out, though!
I am nit-picking over my finish/edge-stitching here, but whatevs, I guess

Size-wise, I did the 5 - at this point, I'm sadly just trying to get things SEWN for Camden, so, fun and fancy isn't in my vocabulary; I didn't want something difficult (I honestly felt bad for NOT using the main print as the facing....and then adding piping with the shot cotton, but I told myself to slow my roll), so, I'm sort of the pumping-things-out mode.  You can see the dress definitely looks big on her, which is obviously no fault of the pattern - but add to it that I used a heavier-weight fabric on the dress, which does that awkward thing where it looks stiff/doesn't quite fit right.  I like to think she'll grow into that.  The shirt fits beautifully, even if the photos on a COLD, WINDY morning don't capture that well.


All in all, a lovely pattern, and I'm glad I sewed two of them - bang for my buck and all ;)  Next up???  Likely the School Photo dress....in HEDGEHOG fabric - holla!

Thursday, July 3, 2014

Seuss Rides Again: A Modkid Bailey Romper

For some reason, Camden LOVES the Modkid Bailey romper.  She adored it the first time, and she was super excited when she could change out of her yellow dress INTO this romper.
Circa Spring 2013
The new version is just as fun and was just as easy to sew (I mean unless you count all those annoying rows of shirring, aha!)!
Weirdo girl!
In this 2014 version, I made sure to lengthen the top, as I found the first time, the bodice was too short.  I lengthened it a smidge, and I may or may not have used a smaller seam allowance where the bodice meets the waistband (I also used a 1/4" to 3/8" SA on the cuff attachment).  It fits better than her last one did.  Also, the only other thing I changed was in using a button hole this time around, rather than sewing on lame snaps.  I don't have cool snaps and a snap press or anything, so, when I did it the first time, I wasn't super pleased with the wee metal snaps.  I do NOT love the D-ring, but in Bend, I only have access to Joann Fabrics and the like, so, I used what they had, though I'd prefer a rectangular ring.

As always, I love Modkid patterns, so, I have nothing fancy to say about this one - though I stilllll wish people would stop going PDF-only.  I want more paper patterns :(  Just thought I'd throw that out there, LOL.


Telling me she wanted to pose

Funny how the difference of a chair sure spiffed up that smile!

Wednesday, January 15, 2014

Seashore Sundress...in the High Desert...It's Cool

Maybe if I had set up some lovely beach scene, we could all pretend it's super warm out again!!!  Even pulling out the pail and shovel may have given *some* sort of illusion...

Ah, well - this is reality!  It did hit 50-something today, and it was gorgeous outside, so, I'm not complaining.  We fit in our third bike ride of the week, putting me at 12 miles or so in three days - not bad for about 32 weeks pregnant, aha - hauling Camden an' all!  (But let's be honest:  I have been in gear 1 getting up some of the hills of late!)

I am clearly entirely off-topic at this point, which is part of a bigger issue:  I have 7-8 items I want to sew BEFORE the baby is born, and I'm realizing RIGHTTHISVERYSECOND that it will NOT happen - yikes!  I take one of my machines - and my serger - in for servicing next weekend, which is GREAT....but I can't finish projects without my serger.  I will be without that sucker for two weeks.  So...much prepping of projects in that time???

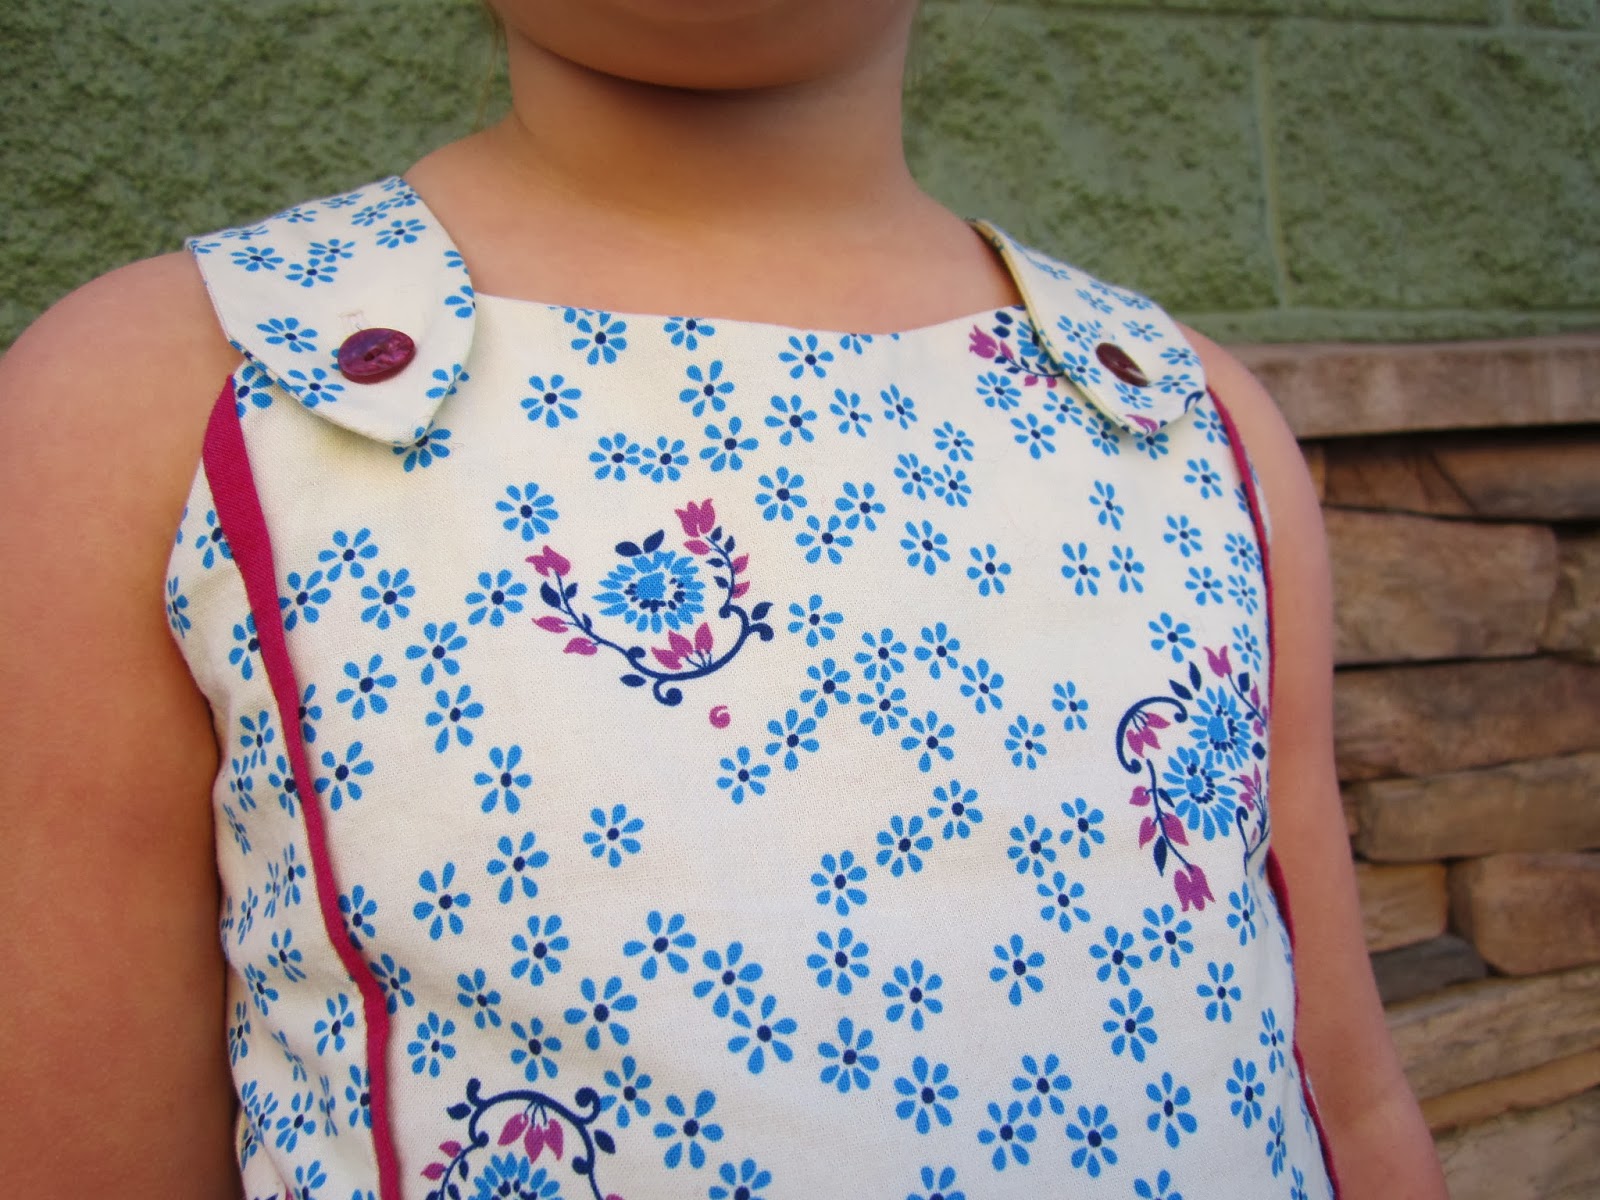
Back on topic:  I have a lovely Oliver and S Seashore Sundress to present today.  Camden loves it, and I'm glad I did step it up a wee teeeeny bit and actually just add some flat piping.  Don't ask me to do much more with any given pattern, per the bold plans stated above.  I gotta whip these suckers OUT.


Sneaking in a Sweet Poppy sweater shot, LOL

This is the third Seashore I have made Camden - always basic, nothing fancy, though I have seen some super cute ones out there.

A LONG time ago!


I love this style, because it's slim-fitting, and naturally, we can just put a tee under it if it's a bit chillier, even though it's not the BEST styling for this dress.  You'll note I made Camden enjoy the crisp air in the photos, though she IS wearing leggings, LOL.

You can just barely see the piping at the pockets, too

She said she needed a picture of her SHOE


This is the largest size - size 4 - of the smaller size set, and I'm SAD to discover that I, for some reason, do NOT have the larger size set, so, that will clearly need to be remedied.  The fit is great, as she is going to be 4 in March, though I know this size will definitely be a bit more form-fitting, come fall.  If there is errata to go along with this pattern, I've never bothered to look it up.  Everything lines up nicely, and I don't use any fancy markings - nice!  I do feel like it comes up higher on Camden - and that other people sew their button holes a teensy bit higher on the strap, but ah, well.  It all works out, LOL!


Note the flap piping peeking out a bit wider at the top  :O