Showing posts with label polymer clay. Show all posts

Tuesday, January 10, 2017

Christmas In July....In December!


If you want drama with a pretty ending, here it IS!

I seriously went insane in the membrane while knitting this sweater.  Something that should have been finished by mid-november or thereabouts took me 8927354 years to finish (well, a month and a half, anyway!), and I was pretty over it by the time I was done.

BUT......
Again, he thinks this tiny screwdriver is his photo prop
His funny face!
The gorgeousness!  I love this sweater, though I sure took some silly detours on the way to finishing it.  The pattern is Christmas in July by Tanis Lavallee.  It is totally well-written and clearly not difficult at all, but I like to mix things up, I guess ;)

My first mis-step was in the cast-on....YES, the cast-on.  It took me three tries before I could get it to fit over Tiberius's head, and his head is NOT big, as compared to his sister's, which also isn't big (how these kids got lucky, with parents like Matt and myself, I'll never know).  Anyway, I used the tubular cast-on, and I was already using a larger needle than recommended, I believe.  I then bumped up the needle size again...and again - or something like that.  I totally forget now.  But no biggie, right???  I mean, that's just the cast-on, so, I was good to go - right?!

Wrong.  I whizzed through the colorwork section (as whizzy as a gal can be when she's carrying the yarn in English style, only), and it looked gorgeous, naturally - Tanis put together a lovely design.  I mostly followed her color recommendations, but I had to switch up one or two of the colors, per the minis kit I purchased - yarn was also by Tanis Fiber Arts, which worked out well.  The main color was in Slate.  All bases were Blue Label fingering weight.

Anyway, I then needed to separate for the sleeves, and I happily did so...then knit along for quite a bit and realized it was going to be too large.  I can't recall if I even tried it on Tiberius.  I ripped out a few inches of the fingering weight design and maybe moved down to a smaller needle size.  I just don't know that I like when patterns size something from size 2-4, which is the size I knit.  I feel that's quite a range for a child that young, and the chest circumference was supposed to be 22.25 inches, but I had 24.  Anyway, I then had to rip out again, because it was maybe still too big, or I was worried it was - I honestly can't remember now.  I die a little inside, just rehashing all of this :O  (I also die right now, because my kids keep coming out of their room, LOL).  I also pulled some nonsense and didn't cast on the number of stitches I was supposed to at the underarm when I re-knit it.  That lost me a half-inch, which is considerable...considering, aha!

The end result is definitely snugger than I'd like, but it's super cute.  If it'll fit through this winter, then I'm happy, aha!  I DO wish I could figure out how to get collars to lay flatter, rather than puff out. Again, great pattern, but I wish there were two sizes for that particular size.  Also, I did have to order more yarn, as I knit at a tight row gauge when moving down a couple needle sizes to meet stitch gauge....and of course, the yarn didn't quite match the original yarn, but it's not so bad.  Just don't look too closely at the second sleeve ;)
At the dentist, waiting for his sister
I'd totally recommend this pattern, for real, even though I was out of my mind and making silly choices while knitting it.  I actually have the yarn to make Camden a version next year (which Tiberius will then be able to wear the following winter or the next).  And you can read my detailed notes on my project page.

And....fun times while stuck around home the past couple of weeks.  The snow is insane this year...and maybe making ME insane :O  I don't mind shoveling, so much, but we ARE running out of room for me to throw said snow.  We have awkward fences on the sides of our driveway - and an annoying tree that may have to depart this world this year - so, planning for a lot of snow was tricky, when it came to shoveling it wider, etc.  We had a warm-up between yesterday and today, slightly, but it's now getting cold again, and I look forward to the 40s next week - yay!
Polymer clay pieces for role play gaming
OMG!  Yearbook photo!!!  Circa 1995??


No, seriously, people

Banana ice cream!
She wanted to pose with her knitting

Friday, December 13, 2013

Truffula WHAT??? A Modkid Quinn!

So, first things FIRST:  I think this dress is beeeeeyond cute!  Second things SECOND:  I think there some details/construction ideas left out in this pattern, which is a first for a Modkid pattern for me.  But I could be nutso; there is always that.


I did do the size 4 in the Modkid Quinn, as chest size-wise (23 inches, finished measurement), it should have been the right choice for Camden.  However, this sucker isn't going to fit her for very long, sadly.  (Interestingly, I feel the back fits quite well - just that the bodice pieces should have come in more, and I'll remember this - I hope! - when I make her next version.)  It's quite snug, and one thing I did to try and fix that problem, though it may have been silly, I suppose, is to widen the button band that is attached to the main dress.  And speaking of this very button band, I do think the attachment method is weird.  From what I understood in the pattern, it is to be attached, right sides together, then turned out, away from the dress - the seam serged...?  Not sure if that was clear.  I chose to attach the button band, widened, as I mentioned, pressing down the back side of the band and top-stitching it closed, after fold it to meet the original seam line.  That is much neater in this sort of situation.

Also, I do think this dress should have called for interfacing, which it did not.  If I had been foreward-thinking when constructing the bodice, I just would have added it, per the norm.  Not sure why I didn't think of it.  I DID think of it when I stared at the skirt, which is ONE layer, and realized I would be attaching BUTTON HOLES to that sucker!  :O  Well, that's no bueno at all, in my humble opinion.  So, I created a wee facing, which isn't the prettiest thing, but it'll do.  My machine would have eaten the fabric ALIVE, wasting Seuss-like resources, if I'd added button holes to ONE LAYER.  (Not sure if you are reading my amazement at this oversight in pattern construction!!!)

So.

Other than those issues and the fit issue, it is SUPER cute.  I'd had this Seuss fabric since the early Spring, I believe, and I'd used some of it on another Modkid pattern, the Bailey, which Camden loves.


I do prefer adding elastic in the arms to get the desired ruffle effect, rather than using elastic thread in the machine - it's longer-lasting, and neater, I find.  The general construction of the dress is clearly super easy, and I have actually had the dress done for a couple weeks, buttttt.....!!!!  I was moping about, thinking I HAD to suck it up and buy buttons from a big chain store, when it came to me!  I messaged Tessa Ann on Etsy to order Lorax buttons - holla and hello!!!  They were able to make some super cute teeny Lorax and truffula tree buttons for the dress, and they came out soooo well-done!


So, I squeezed Camden into this sucker, and she had a grand time, jumping about in the melting snow!


And.....looking at these last several pictures, you can't TELL there is snow, aha!  Maybe a wee bit ;)

Thursday, November 7, 2013

Tessa Ann Designs (Buttons, y'all!!) interview time!


Holla, y'all!  Tonight, I'm featuring an interview with Tessa of Tessa Ann Designs.  She and her husband design and sell super fun polymer clay buttons on Etsy, which people use for knitting, sewing, hair accessories and even collecting!  Her Facebook page can be found here, and just drop a convo on Etsy if you are needing any customs - or look through the pages and pages of ideas!
Here are a couple pictures of Camden in projects with her TA buttons!  (And let me tell y'all out there that it is WAY a LOT of WORK to scour for old pictures that show what you want in DETAIL.  Argh.)
Oliver and S Book Report dress

Springtime in Hollis

Wendy Sweater

Without further ado....
What started you in the business of making buttons?  Did it start out as mostly a hobby/side business, or did you have big plans from the beginning?  
In an effort to create a new idea for a scrapbooking embellishment for a project of mine, my husband and I discovered polymer clay in our local craft store aisle. We knew we wanted to make handmade buttons with it, but had no idea how we would even begin. We scoured the aisles of Michael's, pulling things that were good shapes and textures in order to possibly make buttons. I was working at my local scrapbooking store part-time during this time and my employer really loved the buttons I was creating and let me put a row of buttons up on the shelves for sale. Within the day, they were mostly sold out. This excited me. I went home, and Steve and I baked trays and trays of buttons to take and restock the shelves. Again, they sold out. A customer suggested we open a little shop on Etsy. I had never heard of Etsy, so I had to check it out. I was so impressed at the level of creativity on Etsy. I read success stories about how people were supporting themselves through their hobby. I had to try. This had always been a dream of mine. To support my family doing something I was actually passionate about and loved doing, not just clocking in at a meaningless 9-5 job, where I was just present and getting through the work day. In April of 2008, I opened my Etsy shop, selling my buttons on handmade decorative pillows. After many e-mails and messages from potential customer,s inquiring about where they could find the buttons on the pillows, I only then was confident enough to list a few sets. Again, they sold out. This little bit of success excited us and we began trying out many styles of buttons and really mastering our craft.
For your particular business, did it take a lot of capital to start up, or was that not a huge factor?

It took us literally, under $10 to start our business initially. Product cost was super low and Etsy’s  fees were reasonable.

I understand this is a husband/wife effort; was it that way from the beginning?  How did it come about?  

Steve and I have worked on buttons together from the very beginning - always a team, but at that time, he worked full-time, managing a bank, and would come home to help me fill orders. Two years later, we realized we could do well with both of us at home filling orders and creating new designs. It was January of 2010 when we decided to see if we could make it work... if we could earn a living all on our own, making our handmade buttons. It was scary and we were unsure, but we did it, anyway. We believed in our buttons, and by that time, they had become a huge hit and we were shipping them all over the world.


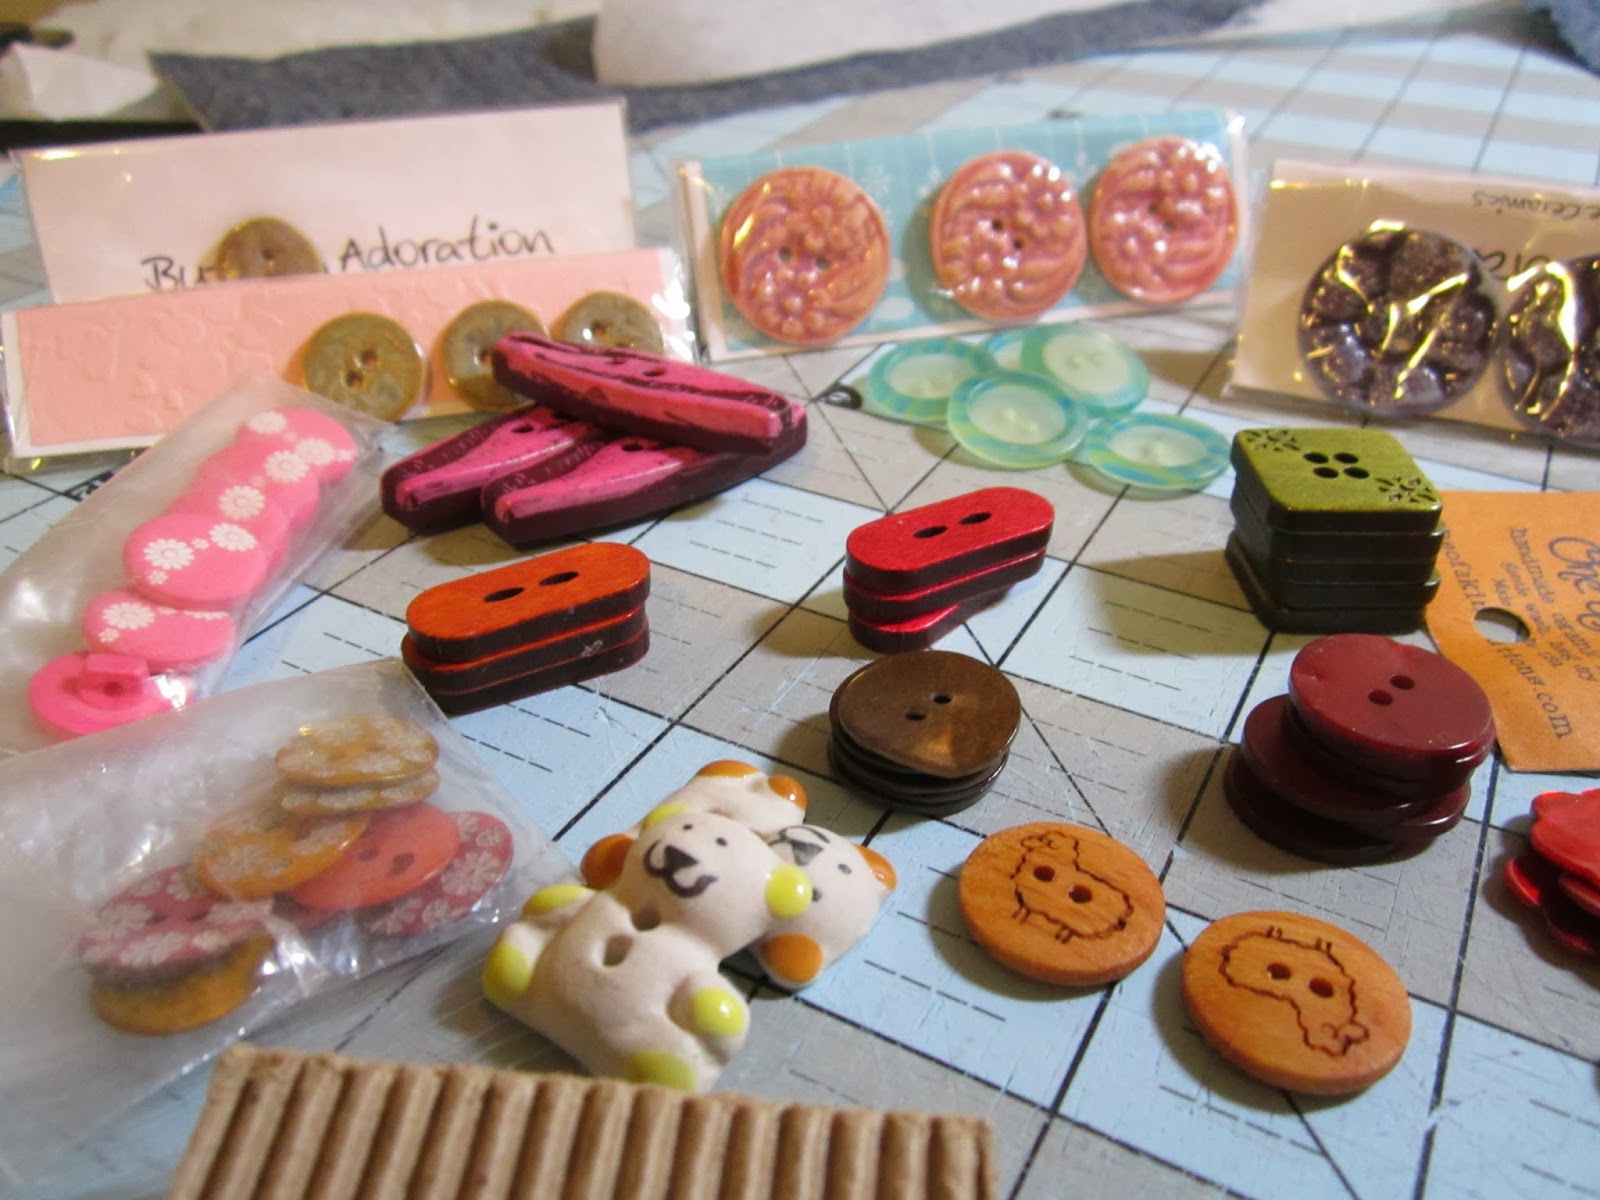
Buttons soon to find a home

It's all in the details!

Is the business now something bigger than you thought it would ever be, and what are your hopes for expansion, in terms of new products that you offer?  I see, for example, that you recently came out with stitch markers for knitters - had people been asking for them?  What else do you offer now, besides buttons?

I am always dreaming of expanding and taking our business to the next level. I dream of teaming with a manufacturer and creating an entire line of product based on our button designs. I can envision an end-cap at the end of Joann Fabrics, with a collection of fabric, buttons, yarn and trims that all coordinate. We really try and pay attention to what our customers are asking for, and stitch markers were something that was continually brought up. “Oh, your buttons would make the most adorable stitch markers” is what we heard over and over. We decided to buy some supplies, make a few up and see how the response was. Just like our buttons, the response was awesome and we now have a rather large list of custom orders that we are excited to create.

What makes this the best job for you and your family?  How does it help and how does it hinder you when you need to make plans/go out of town?  Do you and your husband work together or separately during the course of a week?

Working from home has its benefits and struggles. The benefit is we can raise our daughter together as a team, and we can come and go as we please. We can work as much or as little as we want. We can show up for work in our PJs!! Nothing is tying us down. We also love that we can literally run our business anywhere in the world. We have even dreamed of living abroad for a year or two. Travel plans have to be really planned out ahead of time, as we never close our business, and we always have pages of orders to fill each week. So, going out of town means working double time to get caught up. This means we really don’t go out of town but only 1-2 times a year. It’s a sacrifice we have to make now, but we feel it is worth it, as our business is just growing and growing. We feel we live in the most beautiful town on Earth, so just taking a drive to the river or heading downtown Bend to have some cocoa is enough of a vacation for us!  Before our baby girl was born, we worked side-by-side 10-12 hours a day 7 days a week creating and filling orders. We can’t really do that now with an almost 2 year-old. We have a good system in place. In the morning, I answer emails while he gets her breakfast. When she goes for her morning nap, I head up and help him fill orders. In the afternoons, we trade off working, based on who has the most buttons to make and who can get them done most quickly. Admittedly, Steve is much quicker at reproducing buttons than I am. I tend to be a bit of a perfectionist and a bit too meticulous ;)  

Lastly, when creating custom products for customers, what helps you in the design process?  What do you like a customer to help out with?  Photos, etc.?

When customers contacts us for a custom order, they usually have an idea of what they want, and I just help them decide what colors they would like if they are matching to a yarn or fabric. There are times, though, when a customer has no idea what they want and that’s always fun too! I usually reply with an outline of what I need to get the creative process going such as: What size of buttons does your project call for? How many buttons do you need for your project? Most of our customers are knitters, so a colorway name is usually given or a photo is attached by the customer of their work in progress. And, lastly the theme. Do they want simple buttons or something with a design? Once they reply with these questions answered, I am able to brainstorm and come up with ideas for them to choose.  I always love taking photos of the finished custom order and proudly (okay, sometimes nervously) presenting the order to the customer, hoping he or she will love what we have designed for them. Each button is made with a lot of heart and soul :)


All those buttons!
Thanks so much to Tessa for this great interview!!!  Her is a photo of her super cute family!


Wednesday, October 2, 2013

when sewing comes to a screeching halt: buttons, where art thou?

Just tell me I'm not alone, and I'll feel a wee bit better.

Why, whenever I need buttons, are they scarcer than soft brown sugar at baking time????  This is a BIGBIGBIG problem, with more than one cause.

#1 - I'm entirely too picky.  This, I know.  One thing I do not like to do, whenever possible, is support big box stores.  Since I have moved to Bend, OR, I have found myself doing that more than I'd like.  When in need of a button, I race off to Joann Fabrics or some such nonsense, and I find myself mulling over racks upon racks of brightly colored plastic.  I will admit to not minding an awesome plastic button here and there, but I hate that I'm limited in this arena, as I think so much of what I find is horribly ugly.  Don't hate.  And don't curse me forever, Joann Fabrics.  (I need you for those last-minute button and elastic purchases.)

#2 - In general, there just aren't enough button stores to go around.  I had but one chance to peruse The Button Emporium in Portland, OR, when I lived up in that direction, and they have a large selection, but I need an agenda in a place like that.  With too much to choose from, I just wander around aimlessly, thinking there is nothing that I need - meanwhile, they could have plenty in stock right under my turned-up nose!  Besides The Button Emporium, I have yet to find another button- or notions- specific store.  How wonderful that would be!  Josephine's Dry Goods in Portland also carries a stock of buttons, and I had found a few there, but they are no longer open, as the owner retired.  One of my favorite places to find buttons for adult sewn wear, especially, is Bolt Fabric Boutique on Alberta in Portland.  More recently, they started carrying some lovely glass buttons at lovely prices, and I snatched up as many as I could, knowing my penchant for never having what I need.  In fact, here is my lovely Violet blouse by Colette Patterns, where I used some of my glass buttons:


Lastly, the yarn shops in Portland, Happy Knits and Twisted, carry some buttons, but there are buttons I find acceptable for knitting, and there are those I find work better for sewn-up projects.  Twisted, specifically, has before carried some great ceramic buttons I love to use when making Camden's sweaters.

All this to say, though, there are still NOT enough buttons even in Portland.  I know, I KNOW there must be other buttons out there, and if y'all have any idea where I can find them, please link in the comments!  On-line or in the Portland area would be schnazzy.  I do prefer a pretty vintage glass button when I can get a hold of it :)

#3 - I actually OWN buttons, but NOTHING, and I mean NOTHING, EVER matches what I am making.  EVER.  I have no idea how this happens.  I have wood, glass, ceramic, plastic, metal.  The sizes or styles or colors always seem to be wrong, though, and it is a sad day, indeed, when I come to the point where I know I have to attach buttons to a top or dress.  I'm sure I have a certain gloomy look to the eyes, a bit of a turned-down lip, when I reach for my button containers.  Without fail, I never have anything, though I have SEVERAL things, aha!

#4 - ....and the on-line searches:  I love finding all the great offerings for buttons on Etsy - there are so many great button designers out there, and one favorite I have for polymer clay buttons is Tessa Ann.  They are designed by a great husband and wife team, and I have purchased several of their styles for clothing, both sewn and knitted and have always been pleased.  When it comes to buying this type of specific button, though, I find I definitely need to be a good way through the project, if it's knitted, in order to make a smart decision about what will look great.  They're also super great with customs, so, always ask questions and send pictures of what you're working on!  Other than Tessa Ann, there are so many other great shops I've heard about.  I know so many knitters use Buttons by Robin on Etsy, but I have yet to try hers, though they look great.

So.  When I thought to prepare for this post today, I took out the button tub, actually went through and rearranged all my buttons, noting how beautiful some of those suckers are, and made sure to get them all into the three wee teeny containers I use.  It also made me think I do not have enough buttons, aha!  And I know some crafting enthusiasts out there have plenty more buttons than I ever will at any given time, but for me, that's probably a good thing.  I definitely don't need to become a prepper in the button sense, know what I mean?

Here are my buttons before:


Here they are after:


Again, if anyone ever has a great button resource, please...I am all ears!  I need 'em like I need my Izze drinks lately, as this baby is mean, mean in ma' belly almost every day ;)